Digitizing VHS Home Movies
One of the projects I did during lockdown was digitizing a number of home movies my family had on VHS. I initially checked the prices of professional services, but discovered that I would save a good chunk of money by buying the equipment and doing this myself.
Hardware
This hardware was recommended on various sites. It’s not going to give me the absolute best results, but it should be more than adequate for the relatively low-quality source material. Total cost for all the hardware was a little under $300 USD - with both the JVC and Panasonic being bought used on eBay.
- JVC HR-S3500U S-VHS VCR: S-Video output
- Panasonic DMR-ES15 DVD player/recorder: pass-through TBC
- Hauppauge USB-Live2 Analog Video Digitizer: works out-of-the-box on Linux
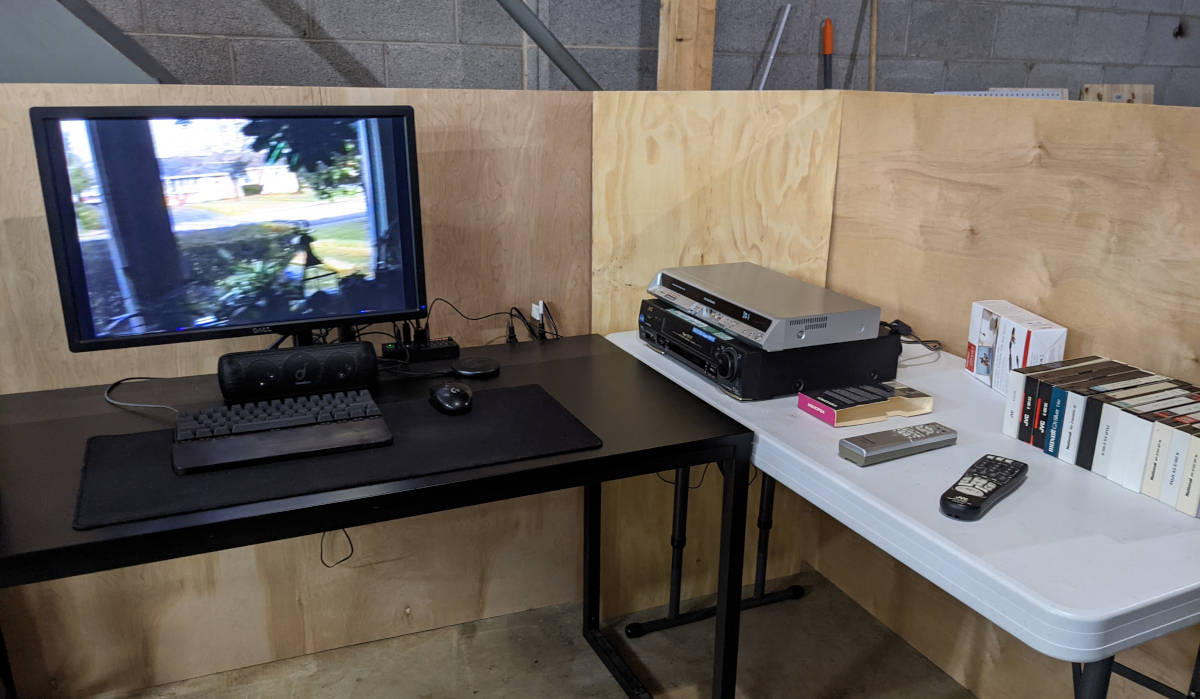
Everything was connected like so:

I initially attempted conversion without the Panasonic DMR-ES15, but severe visual artifacts led me to learn of TBC (time base correction). In addition to the DVD-related features, the Panasonic DMR-ES15 also has the ability to function as a pass-through TBC while costing much less than a dedicated unit. I don’t have an example of the improvements I noticed on my content, but they looked very similar to those in this video - good enough!
Device Settings
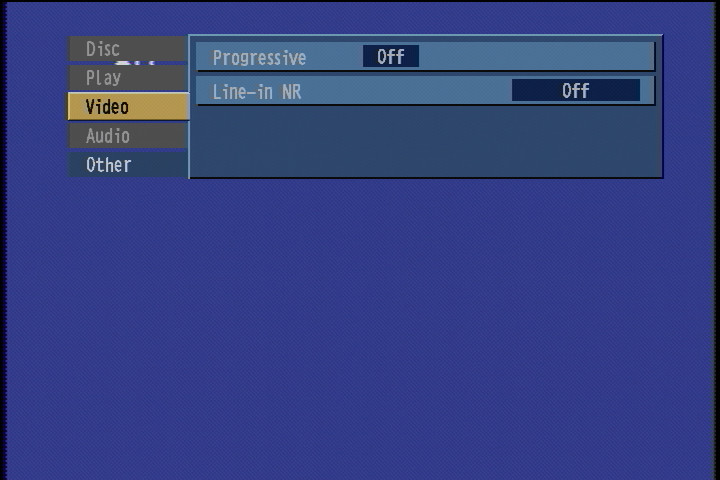
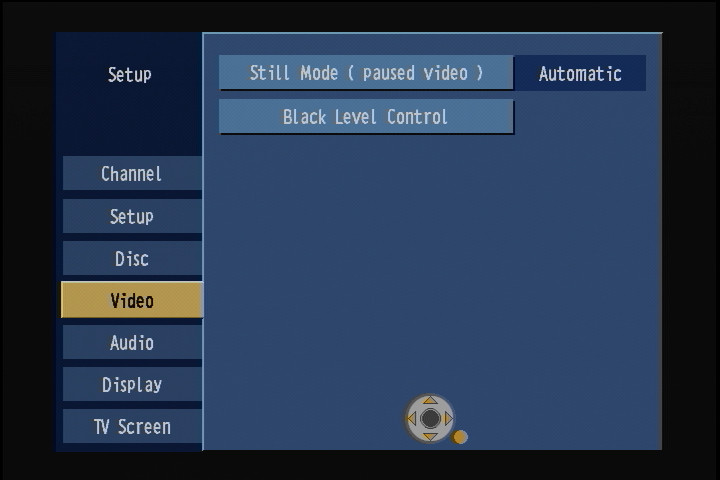
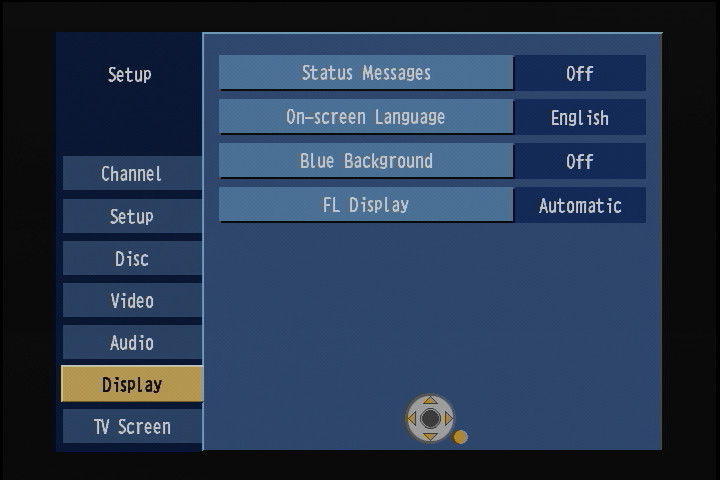
These are screen grabs of various menus with the settings I used to capture.
JVC HR-S3500U S-VHS VCR


Panasonic DMR-ES15
Noise reduction was disabled as I wanted this device to function solely as a TBC.

Software
Each tape was captured as an .mkv file containing a
lossless FFV1 video track and a lossless FLAC
audio track.
I opted for lossless codecs to keep the digitization as pure as possible. Lossy codecs, such as H.264 and AAC, result in significantly smaller files, but can introduce noticeable artifacts depending on how the encoder was configured. These artifacts can be avoided by tuning the encoder, but generally at the cost of significantly slower encodes.
Besides - storage use is of little concern to me as I have more than enough free.
Capturing Process
I used FFmpeg on Linux to capture from the Hauppauge USB interface. This first required I identify the audio and video device paths.
ALSA_DEVICE_NUM="$(arecord -l | grep 'Cx231xxAudio' | grep '^card ' | tr ':' ' ' | awk '{print $2}')"
VIDEO_DEVICE="$(v4l2-ctl --list-devices | grep -A 3 '^Hauppauge USB Live 2' | grep '/dev/video' | awk '{print $1}')"
Next I needed to configure some parameters on the video capture device.
# capture NTSC content
v4l2-ctl -d "$VIDEO_DEVICE" -s ntsc

# capture from S-Video
v4l2-ctl -d "$VIDEO_DEVICE" --set-input 1
Now I was ready to capture. This command records both audio and video to output.mkv. It also
only records for a maximum of two hours and ten minutes - very useful since I wanted to set-and-forget
each tape.
ffmpeg \
    -f alsa -i hw:"$ALSA_DEVICE_NUM" \
    -f video4linux2 -i "$VIDEO_DEVICE" \
    -c:a flac \
    -c:v ffv1 \
    -t 02:10:00 \
    output.mkv
Of course, I wrapped all of this in a shell script found here.
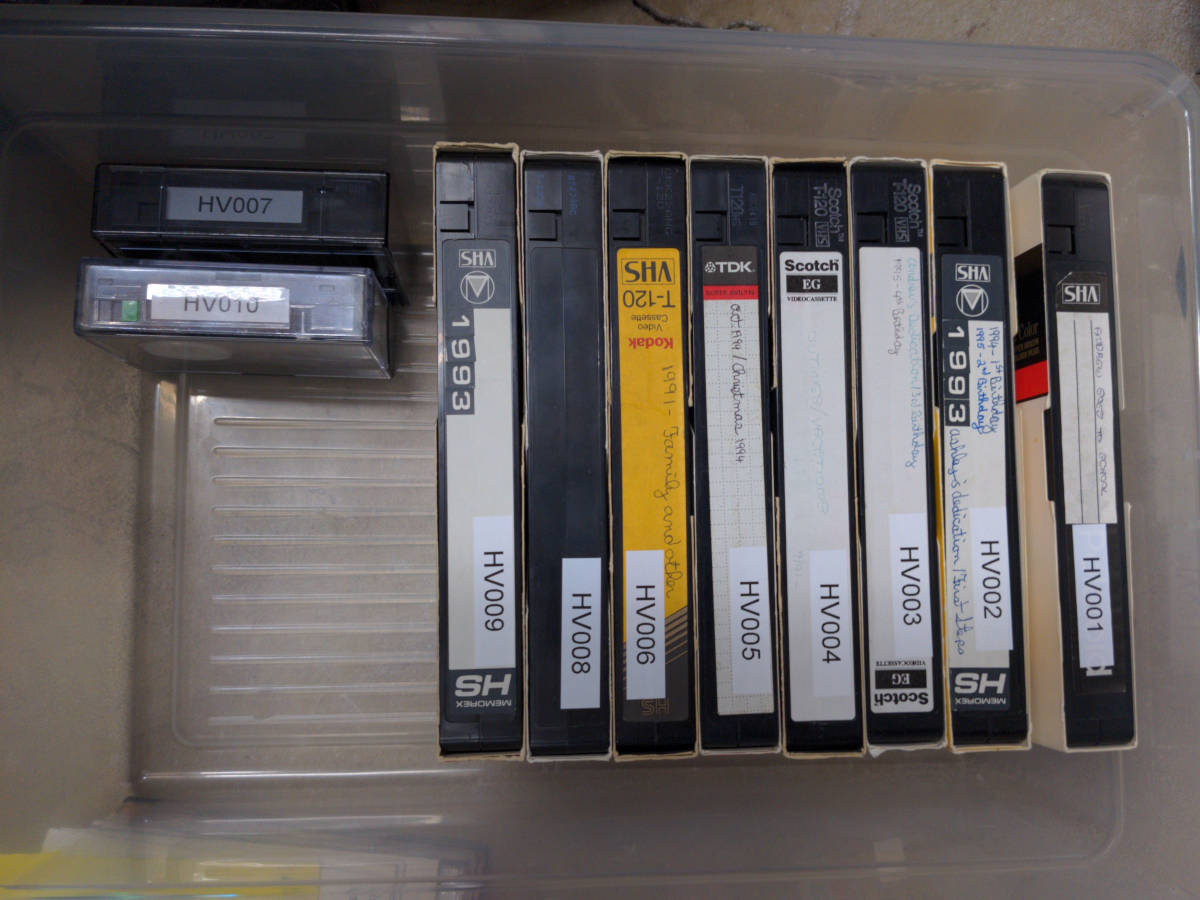
Organization
More than half of the tapes ended up containing either a TV recording or were blank. These tapes were simply thrown out.
For the rest, I affixed a label to the tape and renamed the file to match. This helps keep track which file was derived from which tape. If I need to re-digitized a tape for whatever reason, I know exactly which tape to use.
The first home video digitized was labeled HV001, the second labeled HV002, and so on.
Trimming & Splitting
Most of the tapes contained various events with some events spanning multiple tapes. I used avidemux to skim through and split the raw captures into separate files.
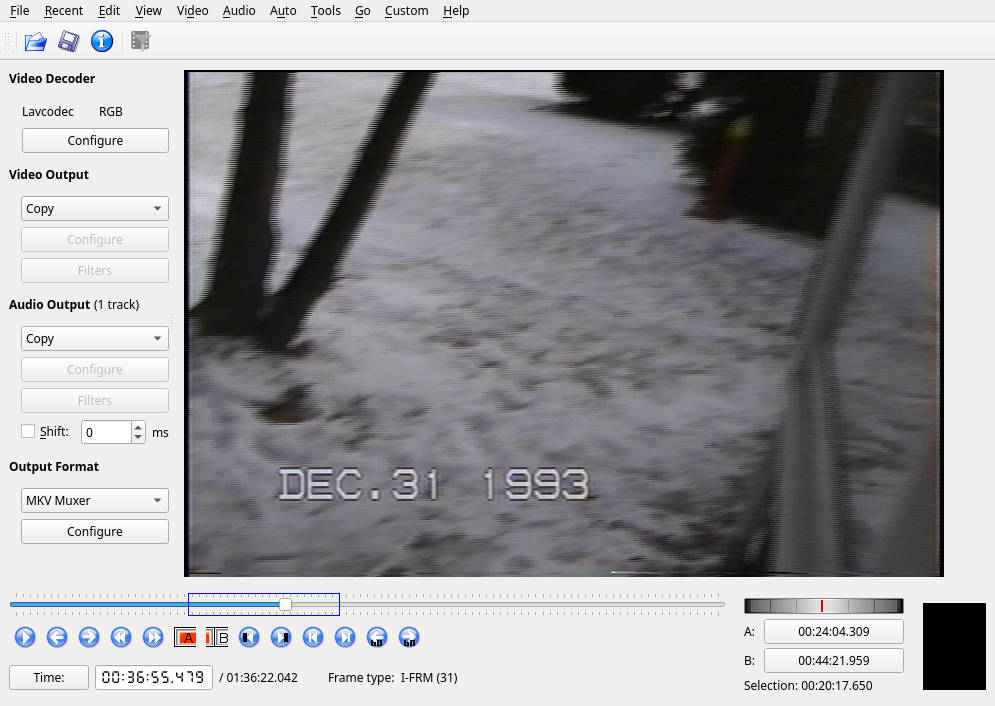
Pretty straight forward to use: set A-B breakpoints and save the segment to a new file. I didn’t bother combining multiple events, but instead just included a “(Part 1)” or similar in the file name.
I tried to prefix the new files with specific dates, but a few were ambiguous. For most I got by using a combination of the label on the VHS or a burnt-in date in the video itself.
Regardless - all the split files still contained the HV### serial number to tie it back to the original tape.
It’s also worth noting that the lossless codecs I initially used allowed me to losslessly split the files. Just be sure that both the Audio Output and Video Output to Copy.
Conclusion
This project was both tiring and time-consuming. The initial VHS-to-digital conversion took the most wall time, but was set-and-forget. Splitting into separate, event-specific files, however, consumed my attention for a good portion of a Saturday.
From the initial 30 or so tapes, I ended up with:
- 15 home movie tapes
- 63 separate files
- 11 hours and 30 minutes of content
- 253GB storage used
The cheapest professional service rate I initially found was $15/hour - about $180 to convert 12 hours of content. That is cheaper than the ~$300 I spent on equipment, but not significantly. Especially considering I’m left with equipment which has known resale value of more than $180 anyway.
I’ll be keeping it all for now. Other family members and even friends have tapes they want digitized; this equipment is also becoming increasingly rarer.